
With the bottle method the orchid lasts a lifetime: every nurseryman’s tactic
Discover the effective and innovative “Bottle Method” to ensure the longevity and flourishing growth of your orchids. This powerful technique, often employed and praised by expert nurserymen, promises to revolutionize your orchid care routine.

Follow the steps below to adopt this remarkable tactic and provide your orchids with an environment that promotes optimal health and sustained blooming.
Bottle Method: Prolonging the Life of Orchid Plants
When it comes to caring for orchids, enthusiasts often seek new techniques to enhance cultivation operations and extend the lifespan of these delicate plants. The Bottle Method, a recycling approach, offers an excellent solution for creating an orchid that thrives for a lifetime. Below, we’ll delve into the details of this method and guide you through the essential steps.
Initial Stages of the Process:
- Select the Right Bottle:
- Obtain an empty, preferably transparent, plastic bottle. Transparency aids in allowing light to penetrate, benefiting the plant roots.
- Remove the label from the bottle to prepare it for the process.
- Cutting and Preparing the Bottle:
- Use a cutter to cut around the central part of the bottle, dividing it into two sections: the lower part and the upper part with the cap.
- Heat the tip of a metal tool, such as a knife or nail, over a candle flame.
- Make several holes in the cap of the upper part of the bottle, ensuring effective aeration.

Continuation of the Procedure:
- Creating Holes for Irrigation:
- Apply the same heating technique to create holes around the base of the lower part of the bottle. These holes will facilitate irrigation.
- Preparing the Lower Part:
- Place pieces of recycled charcoal at the bottom of the lower part of the bottle. These holes will serve as a medium for irrigation.
- Softening the Edges:
- Heat the external circumference of the upper part of the bottle with a warmed iron. This softens the edges, preventing damage to the orchids.
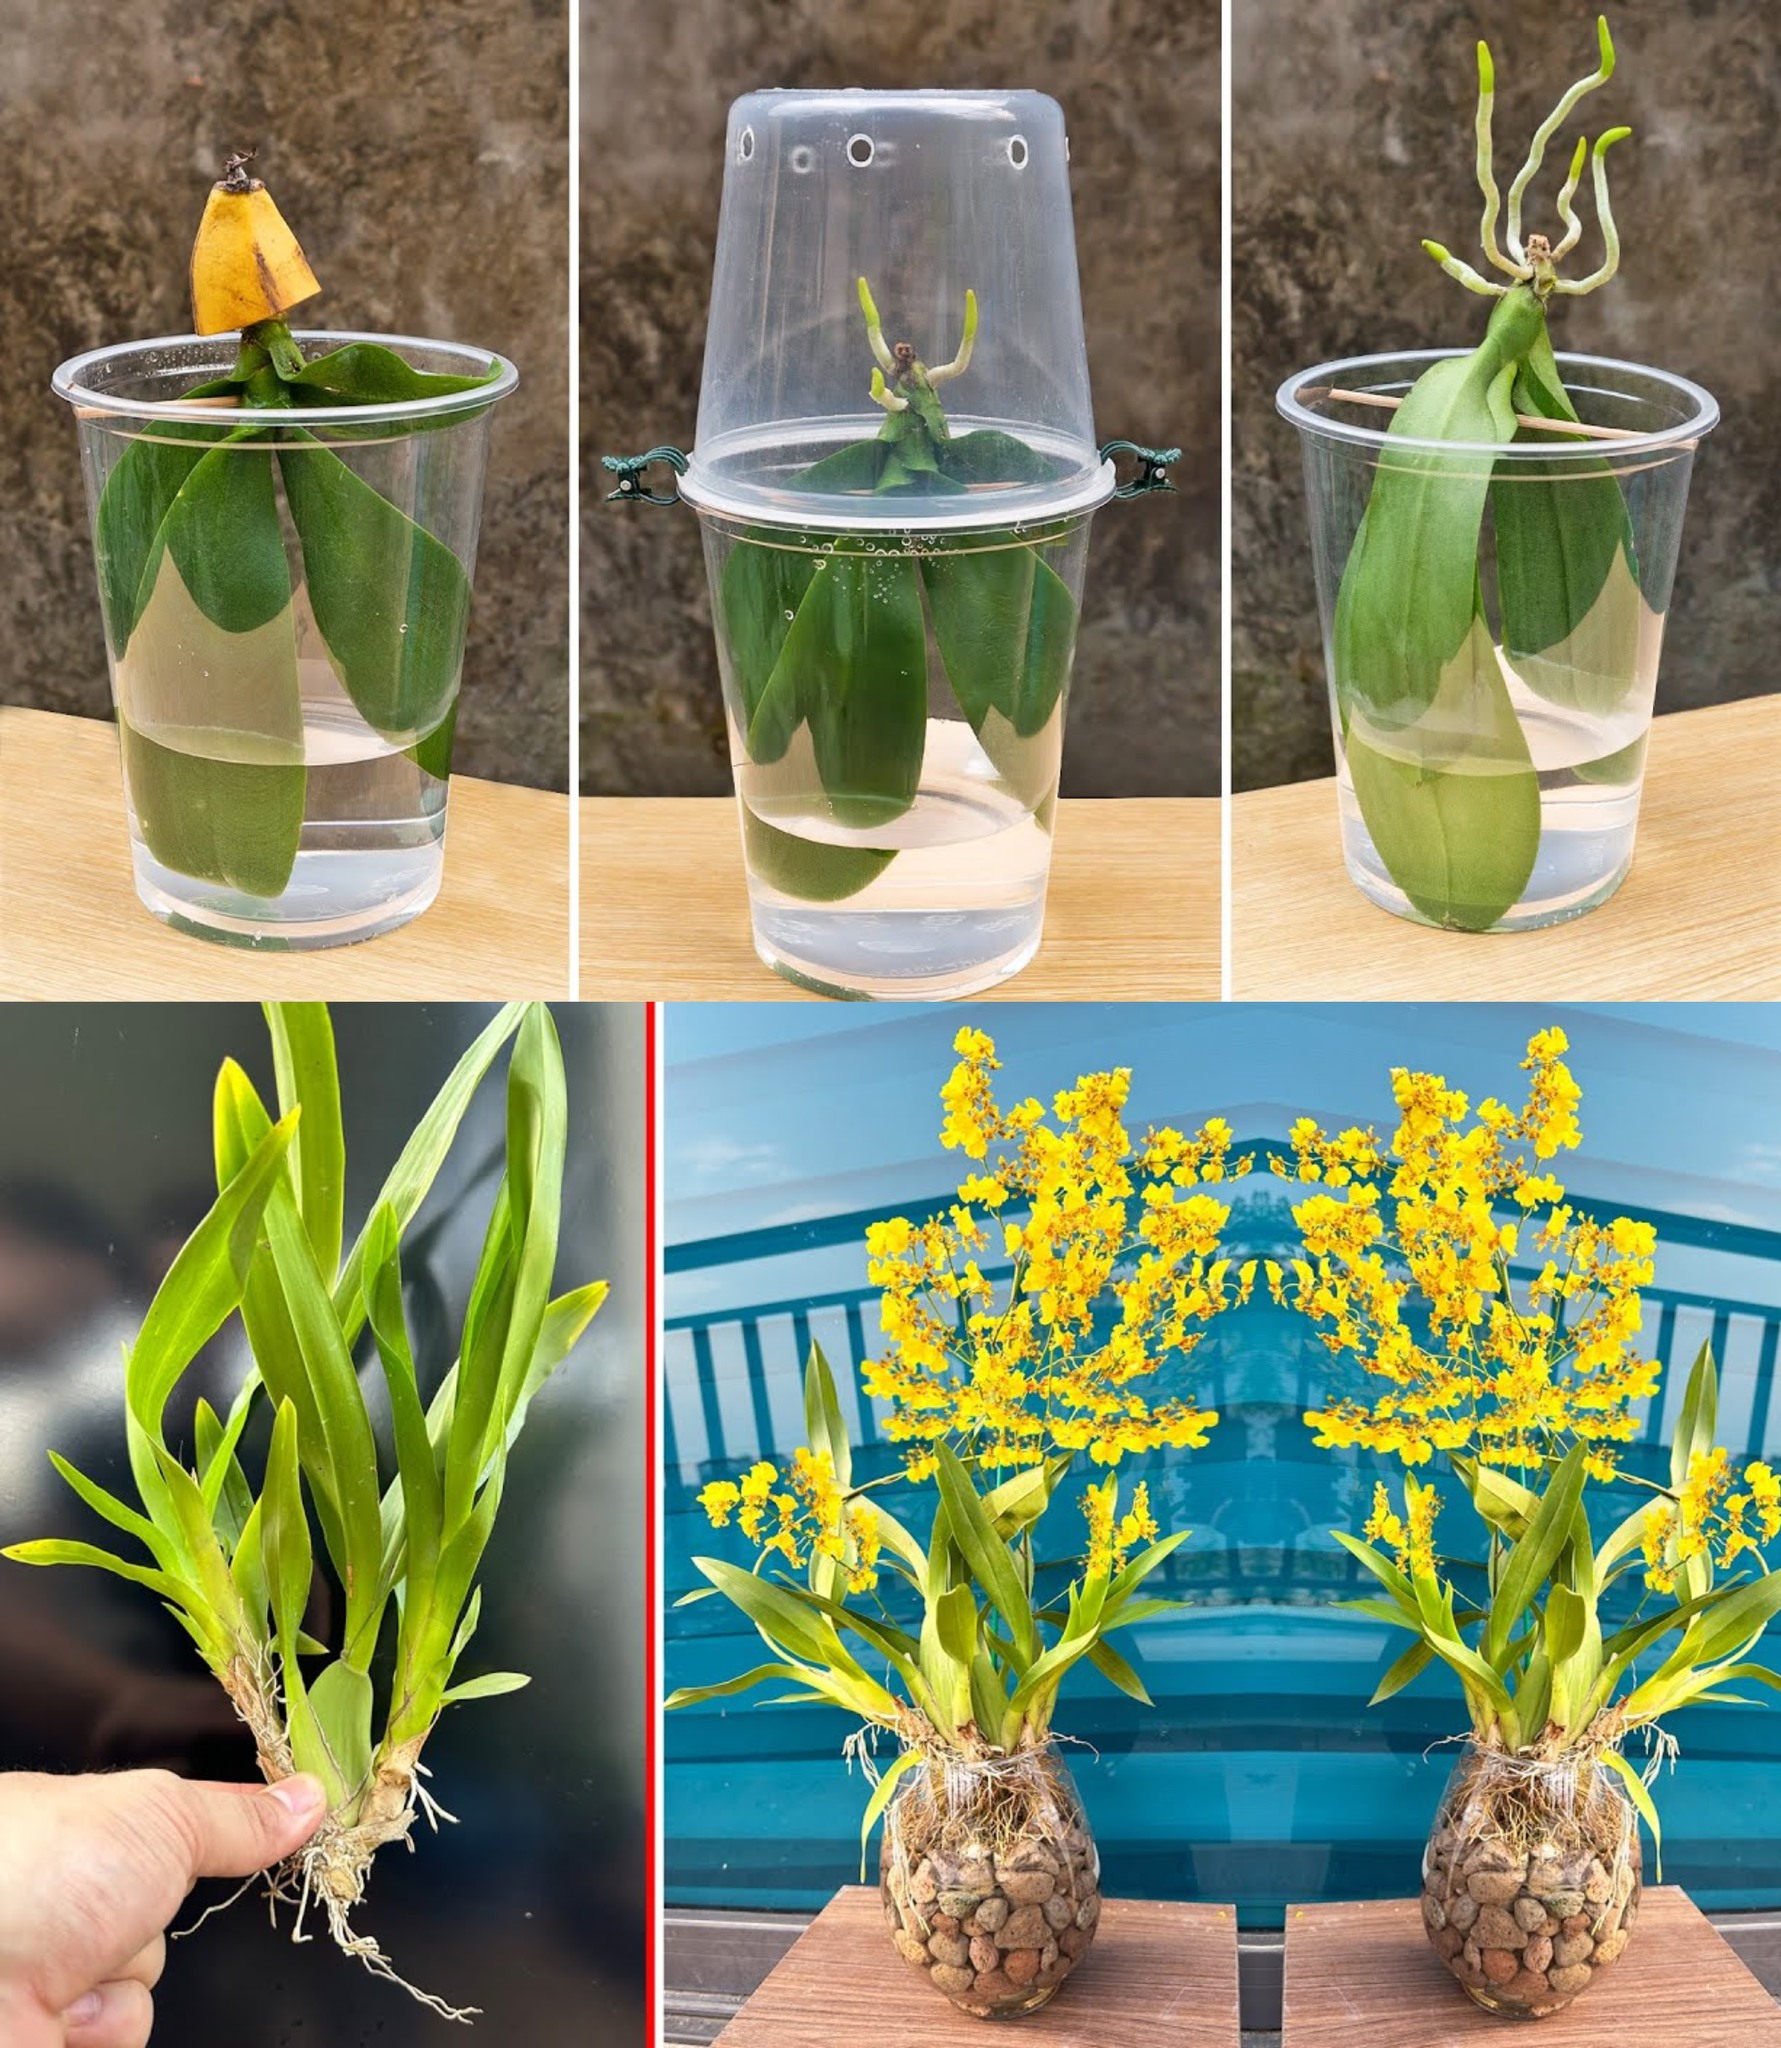
- Planting Orchids:
- Take a well-established orchid plant with completed substrate.
- Gently remove the plant from its pot, exposing the roots.
- Add charcoal pieces and mixed coconut fiber as a base for the plant inside the bottle.
- Assembling the Bottle:
- Invert the upper part of the bottle onto the lower part, creating a sealed environment.
- Fill the bottle with pieces of charcoal, rich in potassium, magnesium, and other nutrients.
- Support and Watering:
- Insert a support stick for the plant and attach hooks to the top of the bottle.
- Water the plant carefully, avoiding overhydration.
- Hanging the Vase:
- Hang the vase created with the plastic bottle using the attached hooks.
- Nutrient-Rich Environment:
- The charcoal will retain moisture and serve as a natural fertilizer, promoting the health and vitality of your orchids.